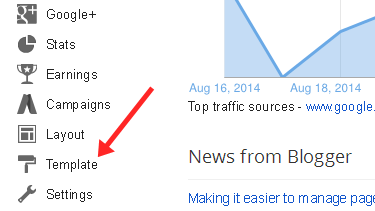
In here we wouldn't talk much about the default Blogger template designer. We want your attention on the HTML side of your template. In future tutorials we will share lot of tricks you can implement on the HTML side of your template.

You have two options when designing your Blogger template. If you click the Orange Customize button, you'll head to the Blogger default template designer. In Blogger template designer you can easily change your blog appearance without any knowledge of coding languages like HTML and CSS.
If you know web designing languages you can click on Edit HTML button an edit the template source code. You can revolutionize you blog appearance when you know how to edit your Blogger template source code . Don't worry after completing our tutorials properly you'll acquire the knowledge to edit your blog like a pro.
From Backup/Restore button you can backup your current Blogger template. By doing this you'll save the current template on your computer. If you are going to make any changes to the current template source code, it's always good to backup your template before doing so.
When you click on the Backup/Restore button, You'll be presented with the options to upload a new template or download the current template. Uploading a custom template is easy but you need to be aware of the following facts
Be aware when you upload custom Blogger templates.
- Editing a custom Blogger template is not and easy task. Mainly you'll need some background knowledge with web designing languages.
- Wired widgets can be added to your layout section that you can't be removed easily.
- For beginners it's better to upload your custom Blogger template to a test blog and see if you can change it to your desire.
How To Upload a Custom Blogger Template?
Most of the custom Blogger templates are in zip files format to download. After downloading the zip file you need to open it and extract the XML document in it to another place of your computer. Then visit the template section from your Blogger dash board. Click on the Backup/Restore button which is shown on the above screen shot. Then browse the the XML document and hit upload to upload your custom Blogger template. This will completely redesign the outlook of your current Blogger Blog.
Example: Let's say you are going to upload classic chalkboard template to your blog
You can browse newbloggerthemes.com to download more custom Blogger templates.
You can browse newbloggerthemes.com to download more custom Blogger templates.
Let's Move To The Edit HTML section.
This is where the source code of your Blogger template is shown. In order to be prepare you for future tutorials we'll need some basic knowledge about the HTML side of the Template.
In order to design Blogs with stunning effects we need to manipulate HTML codes of the template. To finds codes we need click one time on the source code as shown above and press Ctr+f. This will give you a small search box in the upper right corner of the window.
This search box is used to find code on the template.
After you change any of the codes inside the template you can hit preview template to see the changes. If you are satisfy with the result you save it by hitting the Save template button.
That's it we want to talk about the HTML side of the template designer in this tutorial.
Let's Move To Customize Our Blog Template Using the Blogger Template designer.
Even for people with less background knowledge about web designing, Blogger offers a way to customize there template.This is by using the Blogger template designer. This part is up to you to explore. Just hit the orange button which says customize. We thought the below videos will help you to have an idea about Blogger template designer


No comments:
Post a Comment