Success of your blog will depend on how well you create your blog posts. This tutorial is all about creating blog posts. So without further talking let’s start off with our first blog post. Shall we?
Step 1

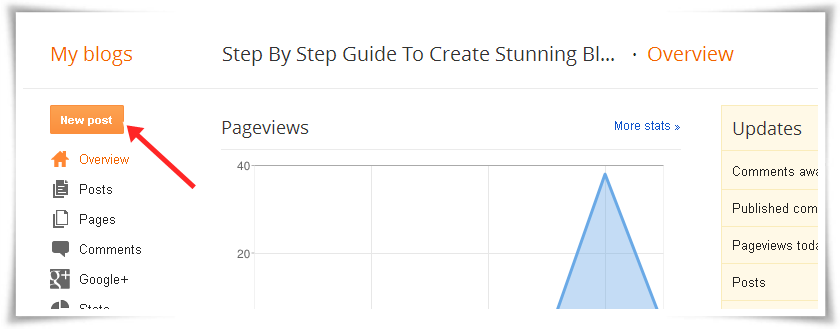
Log in to your Blogger account and click on the title of your blog on the homepage. Then you will be directed to the blogger dashboard.
Step 2

There you may click on the “New post” button (shown in the above screen shot) to go to the post editor of the selected blog.
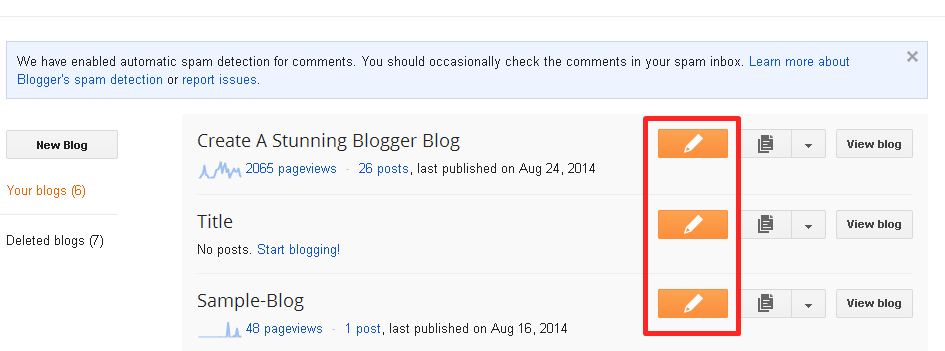
Alternatively you can also click on the orange button in front of each blog to go straight to the post editor of the corresponding blog.(Look at the below screen shot)

Step 3
Before creating any post I’d like you to watch the below video to identify the features of the post editor. It will explain the tasks of most of the icons of the post editor in a simple manner. Please have a look.
Now I think after watching the video, you may have understood that writing a blog post is as simple as creating a word document. But there are some icons which I think I have to explain little more. Those ones are numbered in the above screen shot and the functions of each have been described below.
Click image to enlarge
- The Blogger post editor has two sides. Compose side and the HTML side. Compose side is the visual side of the HTML side. There are unlimited numbers of tricks you can do with the HTML side. We will teach you how you could manipulate HTML side and exploit its abilities to the fullest in the future lessons.
- When you click on the blog title link you'll be directed to the Blogger dashboard.
- Click on the “View blog” button to see how your readers see your blog. This is how the world sees your blog.
- This icon is named as "jump break". It will add a post summery to your blog post. We've explained it's function in a separate article. Blogger Post Editor - Insert Jump Break (Add A Read More Link)
- After editing your post you can publish it using orange color “Publish” button so that your post is allowed for public view. If you are still not ready to publish your post you can always save it and edit it later. You may click on “Preview” button to see how exactly your blog will look like when you publish it.-
- From the right side bar I’ll be specially talking about “Labels” and “Permalink” tabs. Refer this separate article on those two.Blogger Post Editor - Right Sidebar Explained

No comments:
Post a Comment